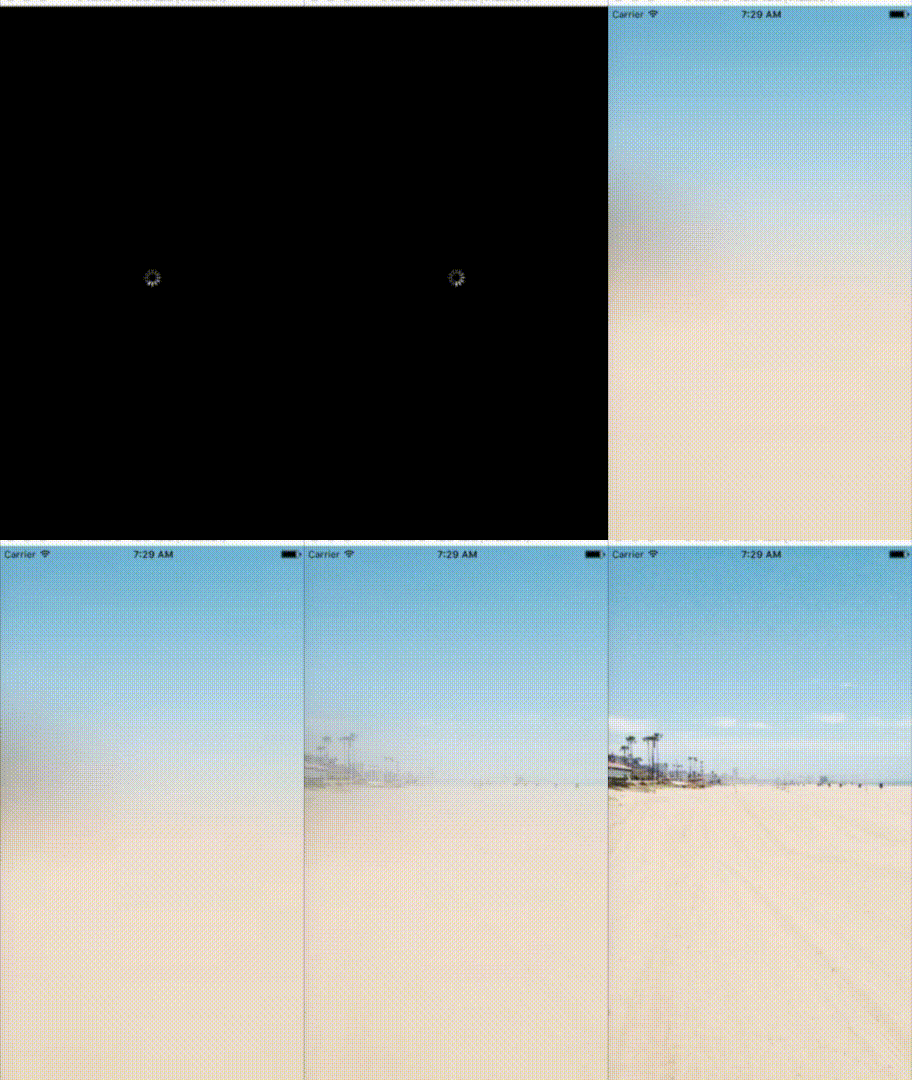
In mobile apps, images are often problematic because of their loading time when the internet connection is weak. During that time, you often end up with an empty area that gives the user no visual feedback.
To work around this problem, one good practice is to first display a very low-resolution, usually blurred version of the image you want to show. Then, once the normal-resolution image has loaded, you fade the first one out in favor of the second.
So we are going to implement this system in this article.
Let's start by creating the project:
react-native init ProgressiveImageSampleIn this example, our image will be full screen, so we will use Dimensions to define the width and height. For the images, we will use Unsplash.
In the index.ios.js file, add the following code above the class declaration:
const { width, height } = Dimensions.get('window')
const picture = `https://unsplash.it/${width}/${height}?image=214`
const preview = 'https://unsplash.it/80/120?image=214&blur'
Here we retrieve the height and width, then define the URLs for the image and the preview image.
Next, we will add the preview image:
export default class ProgressiveImageSample extends Component {
  constructor(props) {
    super(props)
    this.state = {
      isLoading: true,
    }
  }

  onPreviewLoad() {
    this.setState({ isLoading: false })
  }

  render() {
    return (
      <View style={styles.container}>
        <Image
          style={{
            opacity: 1,
            width: width,
            height: height,
            position: 'absolute',
          }}
          source={{ uri: preview }}
          onLoad={() => this.onPreviewLoad()}
        />
        {this.renderLoader()}
      </View>
    )
  }

  renderLoader() {
    if (this.state.isLoading) {
      return <ActivityIndicator size="small" color="white" animating={true} />
    }
  }
}

const styles = StyleSheet.create({
  container: {
    flex: 1,
    justifyContent: 'center',
    alignItems: 'center',
    backgroundColor: 'black',
  },
})
When the component loads, we define that the image is currently loading with:
this.state = {
  isLoading: true,
}
This lets us display an ActivityIndicator through the renderLoader() method while the preview loads. Then, once the image has loaded, we update the state with the onPreviewLoad() method.
Now we will add the main image we want to display:
render() {
    return (
      <View style={styles.container}>
        <Image
          resizeMode={'cover'}
          style={{ position: 'absolute', width: width, height: height }}
          source={{ uri: picture }}
          onLoad={() => this.onLoad()} />
        <Image
          style={{
            opacity: 1,
            width: width,
            height: height,
            position: 'absolute'
          }}
          source={{ uri: preview }}
          onLoad={() => this.onPreviewLoad()} />
        {this.renderLoader()}
      </View>
    );
  }
For now, once the main image has loaded, it remains hidden behind the preview. What we will do is gradually move the preview opacity to 0 once the main image has loaded. To do that, we will use animations.
Add Animated to the list of imports from react-native, then declare a new Animated.Value in the constructor:
this.previewOpacity = new Animated.Value(0)Then replace both images with Animated.Image and replace the preview opacity value with the AnimatedValue:
render() {
    return (
      <View style={styles.container}>
        <Animated.Image
          resizeMode={'cover'}
          style={{ position: 'absolute', width: width, height: height }}
          source={{ uri: picture }}
          onLoad={() => this.onLoad()} />
        <Animated.Image
          style={{
            opacity: this.previewOpacity,
            width: width,
            height: height,
            position: 'absolute'
          }}
          source={{ uri: preview }}
          onLoad={() => this.onPreviewLoad()} />
        {this.renderLoader()}
      </View>
    );
  }
To display the preview progressively once it has loaded, we will change the previewOpacity value in the onPreviewLoad method:
onPreviewLoad() {
    Animated.timing(this.previewOpacity, {
      toValue: 1,
      duration: 250
    }).start();
    this.setState({ isLoading: false });
}
Finally, once the image has loaded, we will set the previewOpacity value back to 0 in the onLoad method:
onLoad() {
    Animated.timing(this.previewOpacity, {
      toValue: 0,
      duration: 350
    }).start();
  }
Here is the final result: